Hey folks,
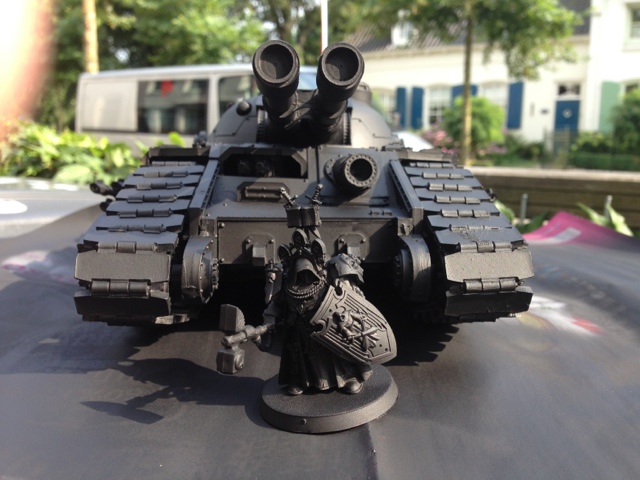
Today I finally finished constructing the Fellblade. Yes, even the gun sponsons and the cables finally fit together after an "elegan/tg/entleman" on a well known imageboard showed me the way. The basecoat -Citadel Chaos black spray paint- did its job well as you can see. I think the whole tank has used a staggering 2/3 of the entire can before I was satisfied and little to no resin was showing.
Aside of the Fellblade, a third kitbashed predator got a basecoat and as you can see, Belial with a thunder hammer and storm shield got a lick of black as well.
Now the painting can commence. Those who are familiar with my work know that I paint all my stuff by hand, with a pencil! I already thought that my Storm Eagle was too much surface work with a pencil, I can only imagine what effort I need to put into this beast and how much Boltgun Metal and (my last) Badab Black it will consume. Nevertheless, seeing it all black has stirred something in my heart and I have to admit, I'm still in love with the thing.
Anyway, enough ranting. See for yourself!
Showing posts with label conversion. Show all posts
Tuesday, 20 August 2013
Saturday, 6 July 2013
A work in progress: Damocles Command Rhino. Part III.
After over two weeks of neglecting the hobby and therefore this blog, I decided it's time for an update.
With good spirits, I continued work on the exterior of my Damocles Rhino. After the black undercoat, I painted the red areas with Mechrite Red and all the metal areas with Boltgun metal. The aquilas on the doors were painted chainmail and the side doors Chaos Black. That's the first step. The second step is covering the Mechrite Red with two layers of Scab Red and painting small metal areas like the exhausts with Tin Bitz. Thirdly, the washing can begin. Lots of Badab Black on the metal parts and Devlan Mud on the red parts. The last wash is several layers of Sepia on the silver aquilas, to make them seem dull gold.
The result is shown below. Not done yet, but I'm getting there. ;)
Wednesday, 26 June 2013
Showcase: The Veterans
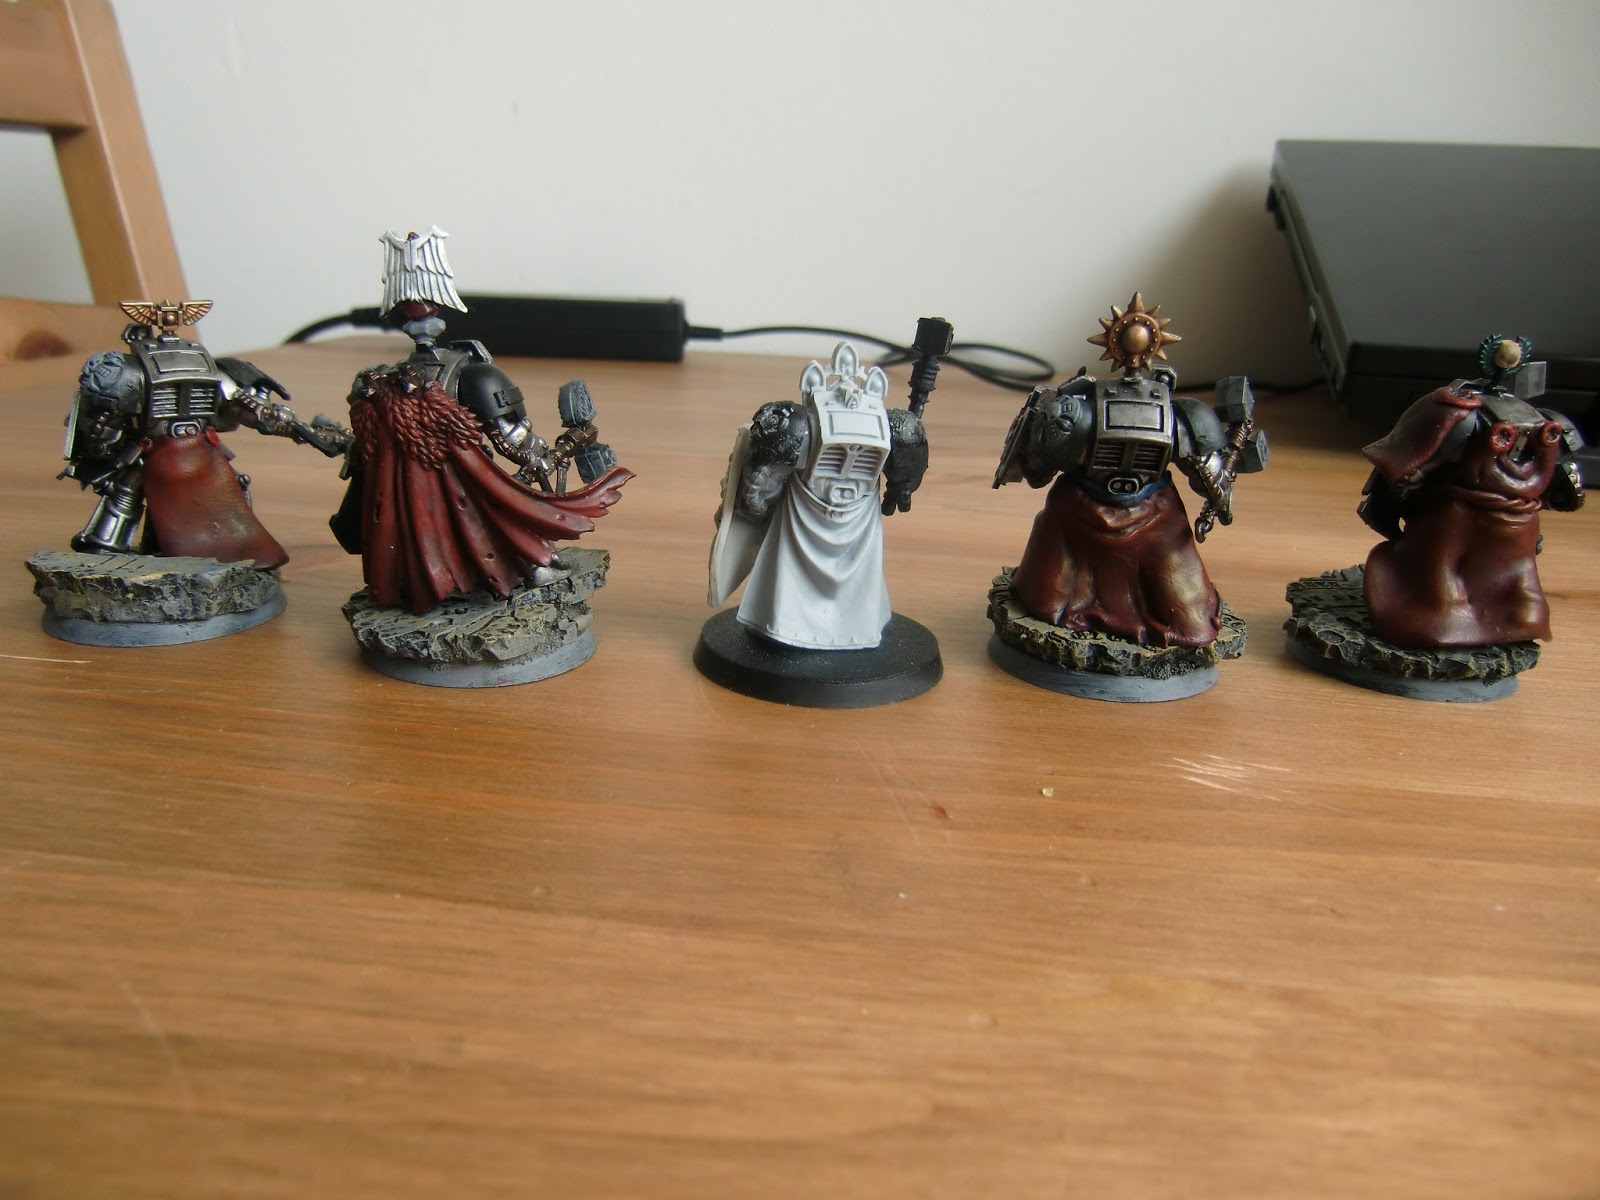
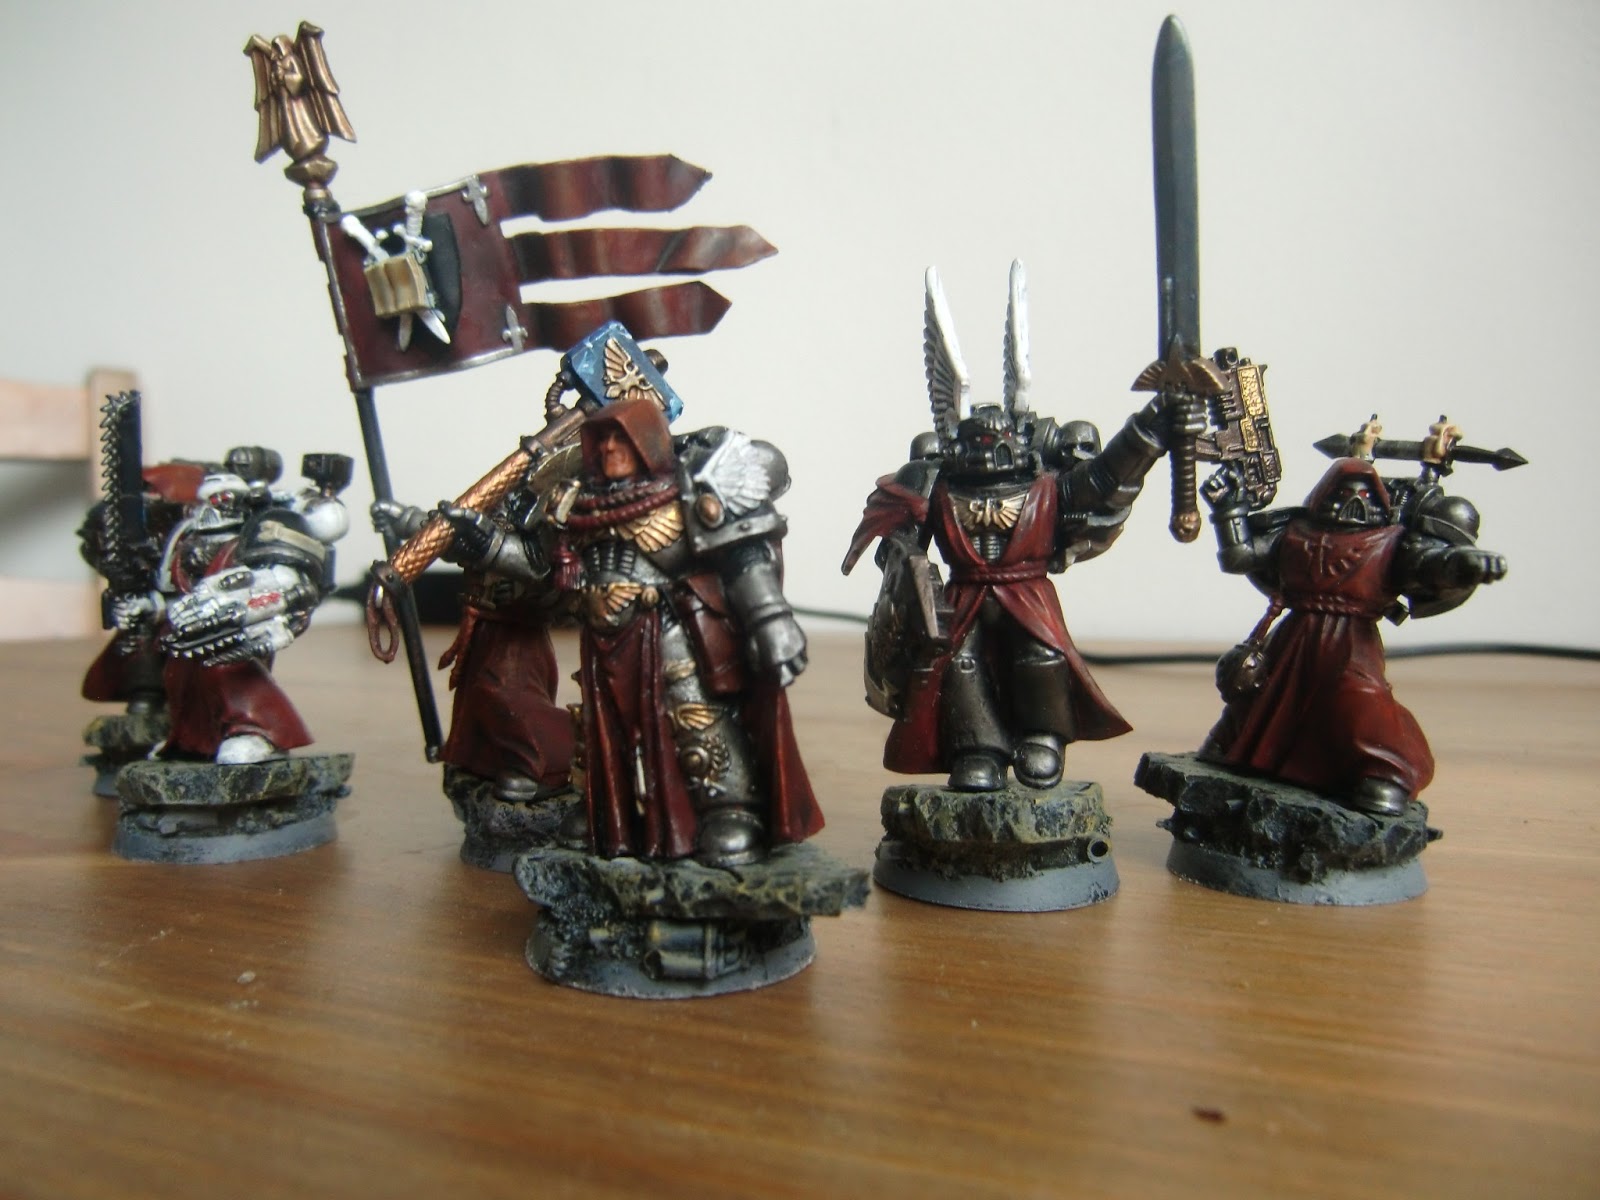
To answer a special request, I began the day with taking some pictures of my veterans: my terminators and vanguard veterans. After reviewing the pictures I've made, well, I concluded that most of them are bad and out of focus. But I'm too lazy to take the pictures again, so they'll have to do. Besides, if you don't click on the unfocused ones, they're not too bad.
Not all the stuff is done though. The assault terminators stand at 90% complete. They still miss detail like eye-lenses and such, which I will get too as soon as I have a day off. Another fancy thing is the new Finecast Belial that I've bought last weekend. I decided to covert him and kit him out of a Thunder Hammer/Storm Shield as opposed to the Marneus Calgar conversion I use as my current Lightning-clawed Belial.
Last but not least there's the Vanguard Veterans. Yes I know I can't use them with the current Dark Angels codex, but that's no bother. I mean, what's cooler than Assault Marines (with the old METAL jumppacks) with awesome power weapons? They've been around a long time and they were a joy to paint.
Anyway, take a look for yourself.
(P.S. Don't look at the dust that's covering some models. Some of them guard a bookshelf when not dying in battle.)
| My Belial conversion - First Commander Trayarch with Squad Tempestus |
| Terminator Squad Tempestus |
| Brother Hollix-Varnus (The first one I finished and thus named!) |
| Brother Bastian |
| Brother-Sergeant Hurios |
| The Vanguard Veterans - Love these guys to death. |
| Unfocused, but had to post them. |
| Power swords. Can't have enough. |
Wednesday, 12 June 2013
Printing your own transfer sheets: As easy said as done.
A few days ago, I took it upon myself to print my own decals or transfer sheets as some prefer to call them. I did this because I am not the best man when it comes to freehand artwork, and because it's an equally creative process, I went all-out to creative a set of awesome transfer sheets.
The sheets come in two variants: black outline and no outline, all credit goes to Dracul from Bolter & Chainsword. After carefully printing them in A5 format, with a high DPI and paper setting to photo quality, glossy paper, it was time to give them a careful, thin but thorough acrylic gloss coat. This is necessary, because the ink's pigment needs to attach itself to the acrylic coat, since the decal paper itself will be solved by a modelling solution: Micro Set.
This is but the first phase of it all, and the future will see more posts about the workings or failings of this project. It's something that needs a lot of care and has a high margin of error, nevertheless, if it does work, it will be glorious. All my Guardians of the Covenant army needs is heraldry and Chapter markings.
The sheets come in two variants: black outline and no outline, all credit goes to Dracul from Bolter & Chainsword. After carefully printing them in A5 format, with a high DPI and paper setting to photo quality, glossy paper, it was time to give them a careful, thin but thorough acrylic gloss coat. This is necessary, because the ink's pigment needs to attach itself to the acrylic coat, since the decal paper itself will be solved by a modelling solution: Micro Set.
This is but the first phase of it all, and the future will see more posts about the workings or failings of this project. It's something that needs a lot of care and has a high margin of error, nevertheless, if it does work, it will be glorious. All my Guardians of the Covenant army needs is heraldry and Chapter markings.
Tuesday, 11 June 2013
A work in progress: Damocles Command Rhino. Part II.
Today was a nice and sunny day. Ideal for turning grey into black. You've guessed that right: basecoating.
Giving a model a basecoat or "priming" it, as some prefer to say, is always a magic moment. It transforms a cobbled-together model or conversion with lots of different materials and different colours (think resin, metal, different plastics, you get it?) into a uniform matte black (or whatever colour you prefer to use). And that means that all there is left is to give it a paintjob. Though it's easier said than done. Painting a model is the best part of the creative process, I think.
By request of a certain follower of this blog (you know who you are ;) ) I decided to show the blackness that is the Damocles Rhino.
One of the main differences of the pictures of the day before, is that I've added a Space Marine Company Master/Captain that sticks out of the Rhino's hatch, in order to clearly mark the vehicle as the HQ choice it is.
The head of the Captain is from the Ravenwing champion and the right arm on which the Marine leans is actually a spare arm from the Damocles kit.
As a size comparison and of course a little showcasing, I've placed it alongside my Land Raider Redeemer, which, honestly, sees too little action. I actually had to use a pencil to brush off the dust in order to prep it for the photoshoot (it was THAT dusty).
Giving a model a basecoat or "priming" it, as some prefer to say, is always a magic moment. It transforms a cobbled-together model or conversion with lots of different materials and different colours (think resin, metal, different plastics, you get it?) into a uniform matte black (or whatever colour you prefer to use). And that means that all there is left is to give it a paintjob. Though it's easier said than done. Painting a model is the best part of the creative process, I think.
By request of a certain follower of this blog (you know who you are ;) ) I decided to show the blackness that is the Damocles Rhino.
One of the main differences of the pictures of the day before, is that I've added a Space Marine Company Master/Captain that sticks out of the Rhino's hatch, in order to clearly mark the vehicle as the HQ choice it is.
The head of the Captain is from the Ravenwing champion and the right arm on which the Marine leans is actually a spare arm from the Damocles kit.
As a size comparison and of course a little showcasing, I've placed it alongside my Land Raider Redeemer, which, honestly, sees too little action. I actually had to use a pencil to brush off the dust in order to prep it for the photoshoot (it was THAT dusty).
Take a look for yourself.
| Of course, the overview |
| The Captain sticking out of the cupola. |
| Company Veterans at the console |
| The Land Raider, which is awesome. |
| As I said, awesome. |
| Awesome meltagunner as well! |
Monday, 10 June 2013
A work in progress: Damocles Command Rhino
After weeks of delay and doubt, my Damocles Command Rhino finally arrived. It's an awesome classic model, featuring two seated marines, a large comms panel and a radar dish on the roof. I can't wait to start painting this model and of course using it in friendly matches and apocalypse games. Anyway, take a look at what I've got here. I mean, how can someone not like this? ;)
| Overview of the exterior and command crew |
| In order to mark it as a command vehicle, I've pimped the doors and front armour a bit. |
| The added communications block is clearly visible on the left corner of the tank |
| Not done yet: still missing headlights and window armour |
| The command crew. I chose not to use the bare heads that were included in the kit. Helmets are better. |
Thursday, 30 May 2013
Showcase: Company Master & Command Squad
Hey all,
It's been a while since I last posted, but with good reason: I was very busy with a lot of things. Work, life, etcetera.
Two week ago I had an epic battle. One of which I promised to post a lot of pictures. Unfortunately, I forgot my camera. Though I wasn't the only one planning to bring a camera (Others didn't forget it!), the quality of the photos taken was very poor, and those few action shots that passed the test were either taken poorly, or full of the people playing with the armies. Not really much use for the blog, methinks.
Just before the match started (early morning, on the day the game was planned) I managed to finish up my command squad. Though it's not fully done (heraldry, I know), it's done enough to give them some love here on the blog.
The Company Master and his squad were riding a Storm Eagle right into the heart of the action in turn three.
After they disembarked, they managed to come into close combat with an actual Soul Grinder.
Only the thunder hammer carried by the Master itself could actually punch through its armour. They were carrying the Chapter Banner, together with a charge, giving the Master two extra attacks. Add that to the three attacks the master has by default, it comes down to a grand total of five staggering hammer hits.
Result: the Soul Grinder had been utterly obliterated. One of the most epic moments in the match.
Enjoy the pictures.
It's been a while since I last posted, but with good reason: I was very busy with a lot of things. Work, life, etcetera.
Two week ago I had an epic battle. One of which I promised to post a lot of pictures. Unfortunately, I forgot my camera. Though I wasn't the only one planning to bring a camera (Others didn't forget it!), the quality of the photos taken was very poor, and those few action shots that passed the test were either taken poorly, or full of the people playing with the armies. Not really much use for the blog, methinks.
Just before the match started (early morning, on the day the game was planned) I managed to finish up my command squad. Though it's not fully done (heraldry, I know), it's done enough to give them some love here on the blog.
The Company Master and his squad were riding a Storm Eagle right into the heart of the action in turn three.
After they disembarked, they managed to come into close combat with an actual Soul Grinder.
Only the thunder hammer carried by the Master itself could actually punch through its armour. They were carrying the Chapter Banner, together with a charge, giving the Master two extra attacks. Add that to the three attacks the master has by default, it comes down to a grand total of five staggering hammer hits.
Result: the Soul Grinder had been utterly obliterated. One of the most epic moments in the match.
Enjoy the pictures.
Saturday, 4 May 2013
Kitbashed Whirlwind.
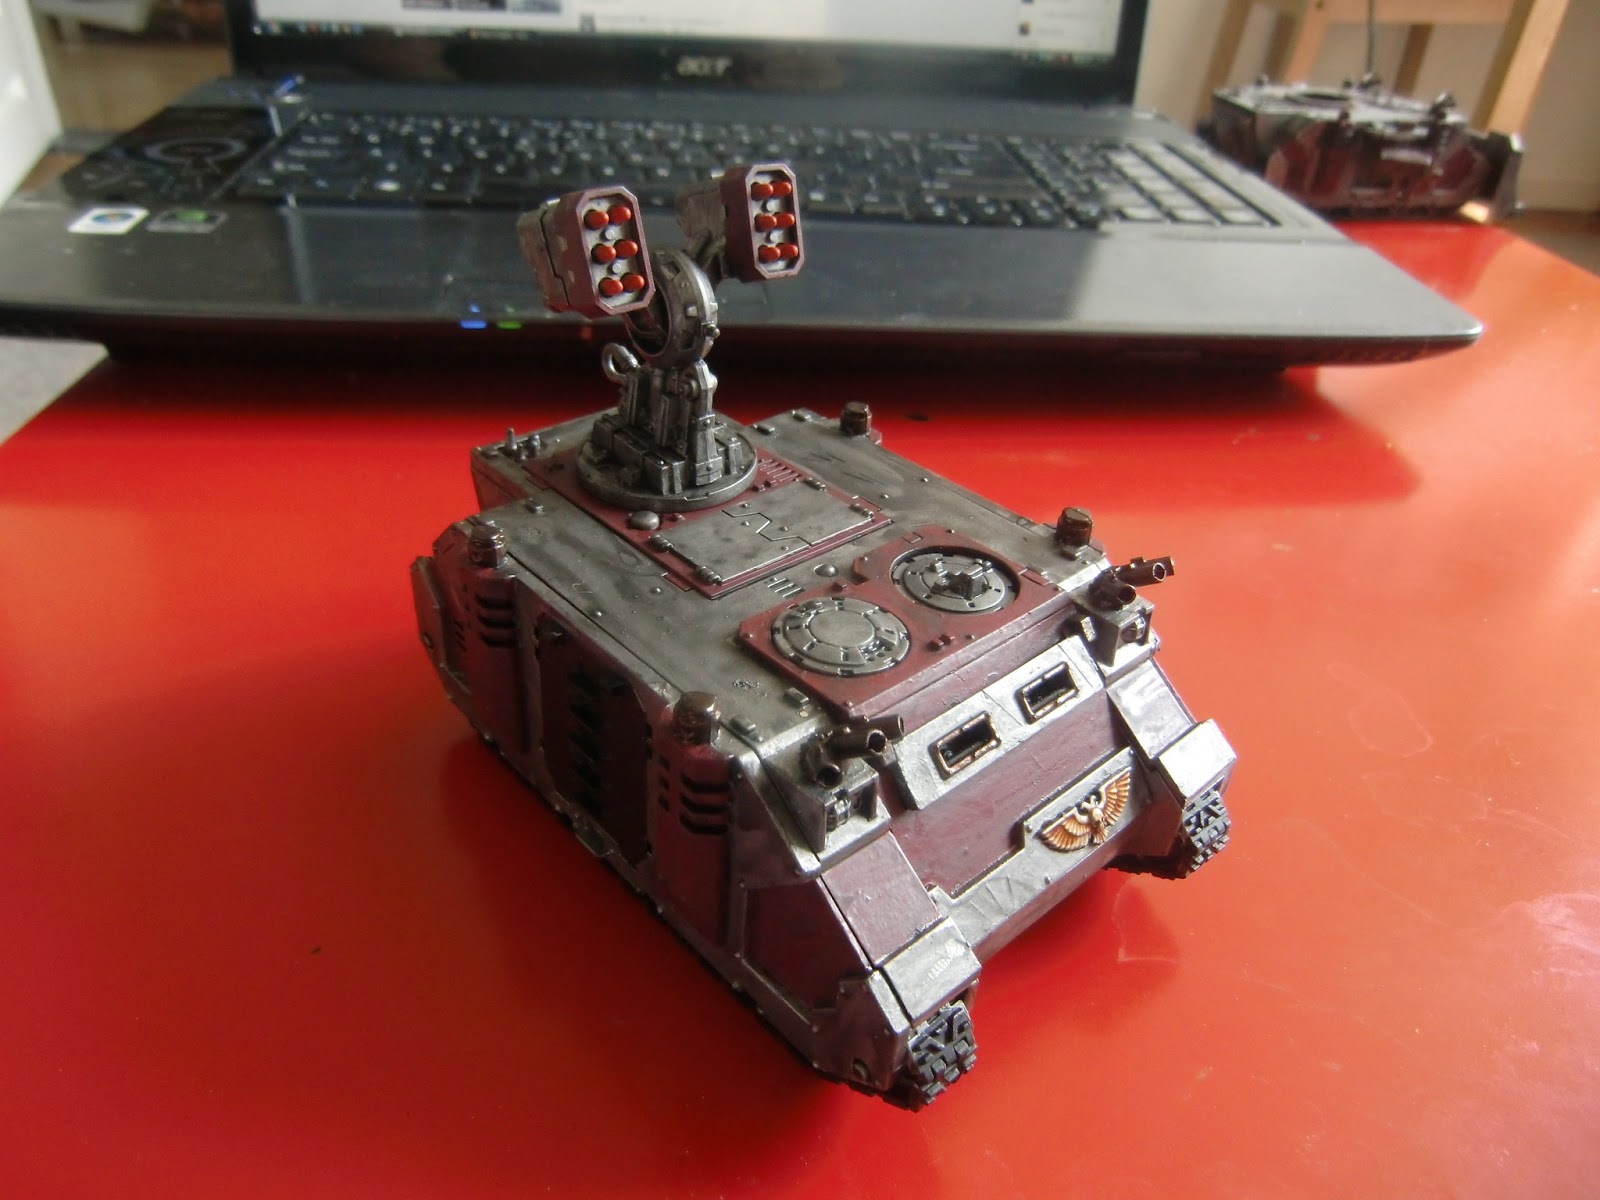
Oh boy. This is a story about how an old Ultramarines Rhino transformed into a kitbashed Whirlwind!
After giving it a nice matte black spray coat, I intended to re-paint it as a rhino. However, after going through my extensive bitzbox, I came across some Typhoon missle launchers from the Ravenwing sprue. I just had to do something with it. Seeing as I've always been too greedy to buy a proper Whirlwind, I went about making the old Rhino into one.
As you will see, it's fairly easy. It uses bits from the Quad-gun from the Aegis Defence Line, glued to the stem from that kit are both missle launchers. It fits neatly into the razorback/predator hatch. And, tadaa.
Friday, 3 May 2013
Storm Eagle in the works. Part VI
Finally, the base has been done.
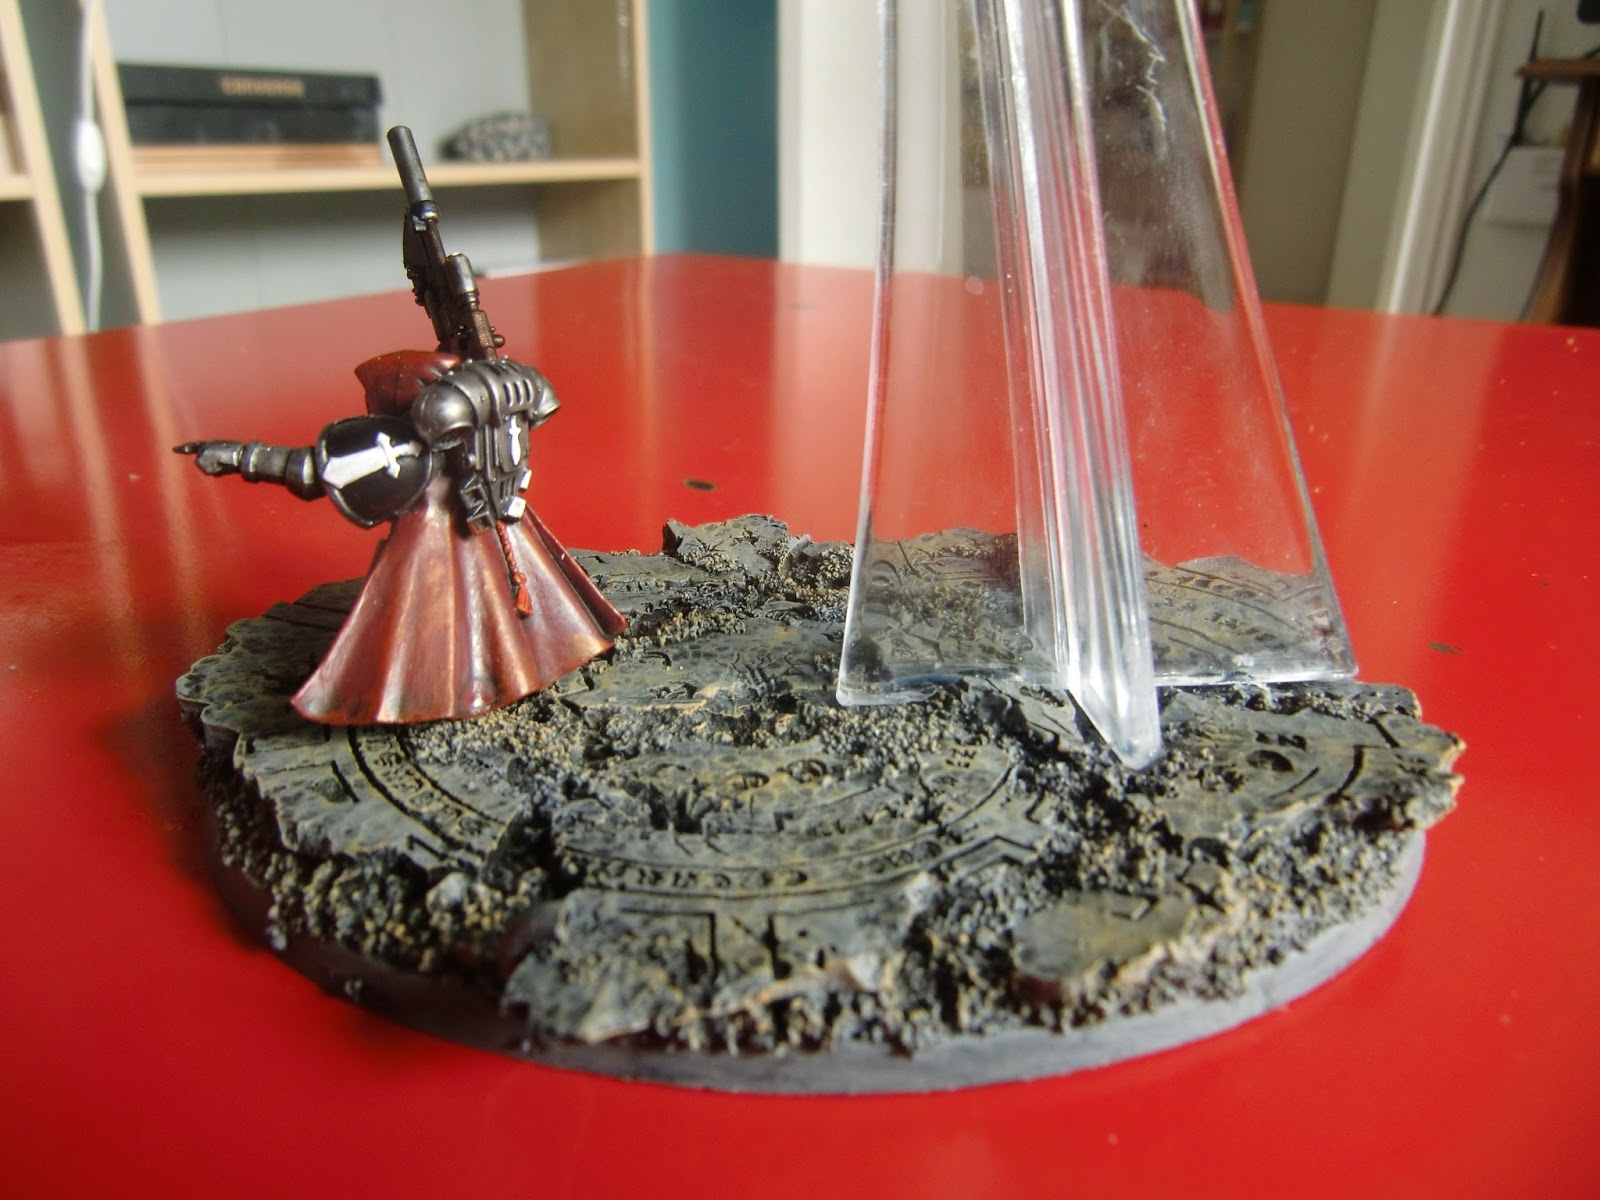
For the base I used a large oval resin "Temple" base by Micro Art Studio. With a hobby knife and lots of exotic files, sweat and ters, I cut out a cross for the flying stem in the resin base. After several faulty glue sessions using a glue gun, I bought some ultra strong super glue, which finally did the trick.
The Recon marine on the base has been made to look like wearing a hooded cloak, Guardians of the Covenant-style, while holding a sniper rifle from the Space Marine Scout set. A little gimmick is the chainblade attachment, which is from the Forge World bolters. It stuck right to the barrel. Very nifty.
Thursday, 2 May 2013
Vehicles of the 6th Company.
Vehicles. Oh how I love to paint vehicles. The bigger the better. I decided it was time for a group shot of my Guardians of the Covenant armoury.
Joining the group soon: a Land Raider Terminus Ultra, a kitbashed Whirlwind and last but not least a Damocles Rhino.
The one thing that's missing, is the chapter and company icons and heraldry. Those are on their way, however. As I'm experimenting with printing my own decals.
More info on this soon.
Joining the group soon: a Land Raider Terminus Ultra, a kitbashed Whirlwind and last but not least a Damocles Rhino.
The one thing that's missing, is the chapter and company icons and heraldry. Those are on their way, however. As I'm experimenting with printing my own decals.
More info on this soon.
Tuesday, 16 April 2013
Storm Eagle in the works. Part V
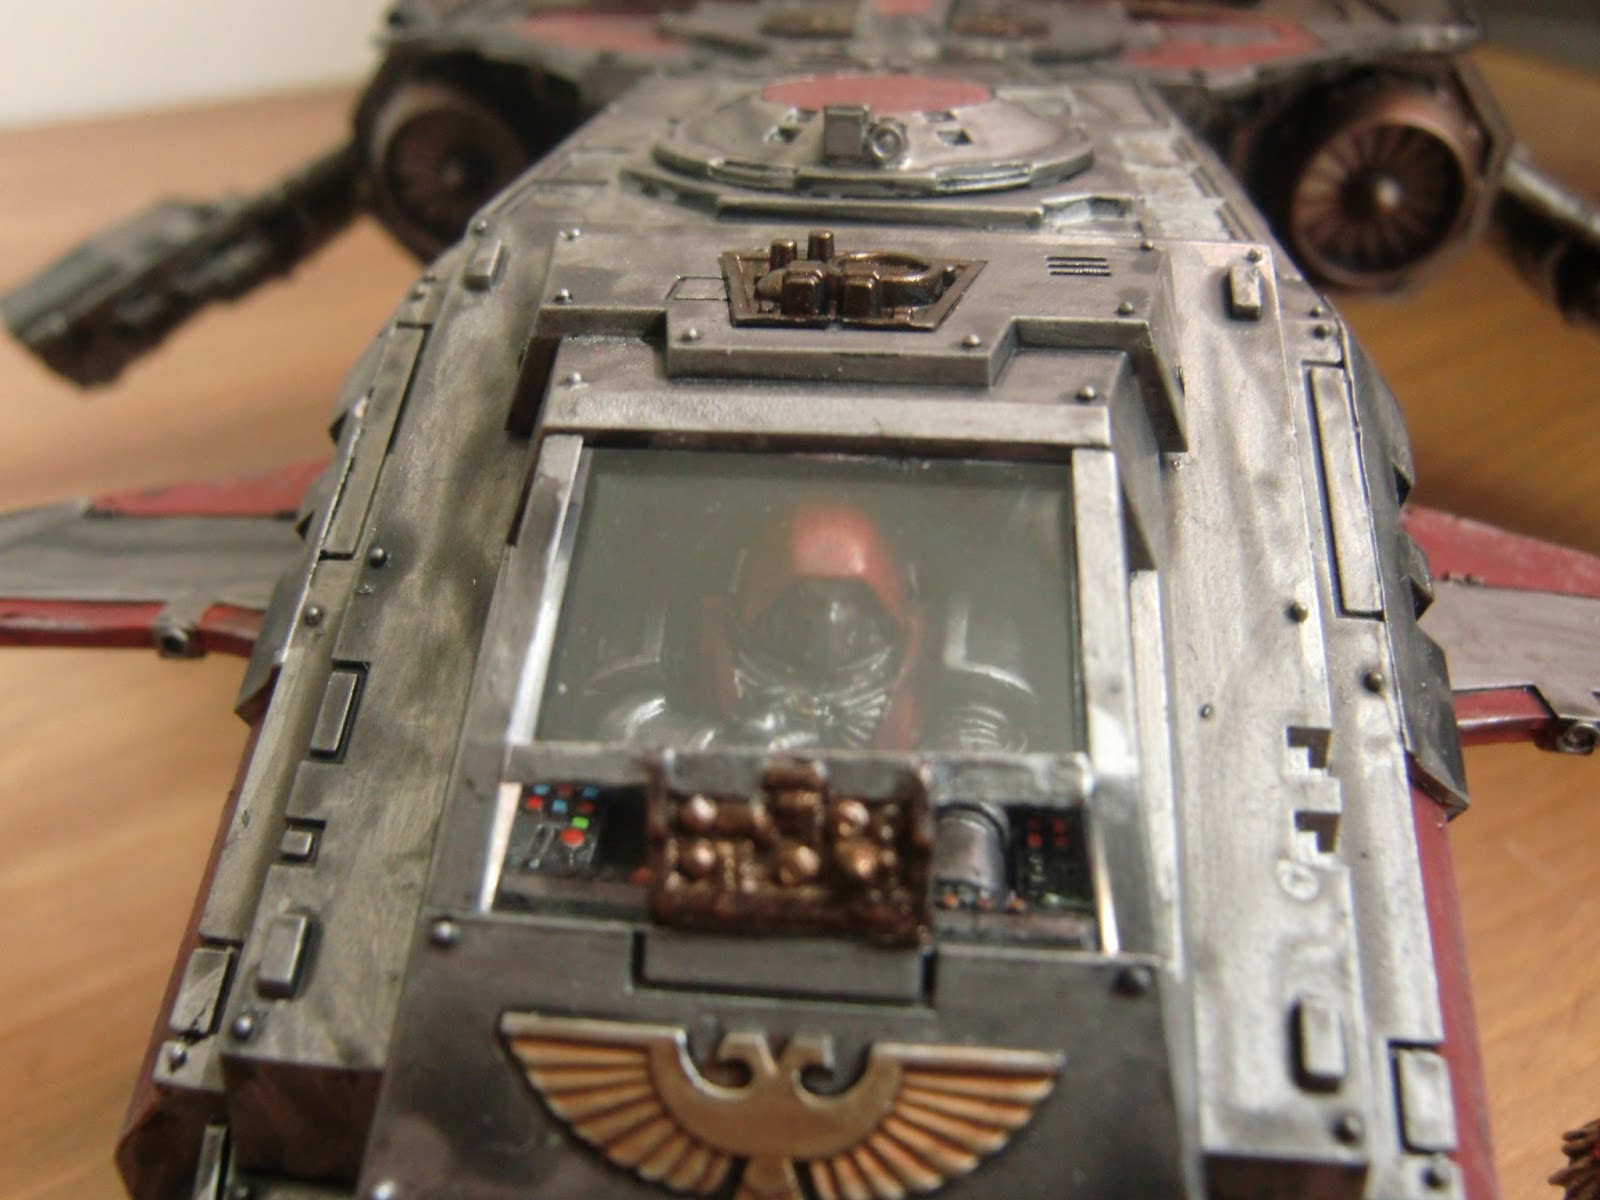
And finally, the cockpit's done. Tough it looks nice, I'm not a fan of object source lighting, so I didn't apply it there. Anyhow. I like how the cockpit has turned out. That, and the robed, hooded pilot was a must and finishes the whole aesthetic. Here are some pictures I took with the last clear daylight today had to offer.
Storm Eagle in the works. Part IV
Almost done.
Those two words mark the end of one of my most frustrating, but in the end most satisfying project to date.
The Storm Eagle has been one heck of a build and a huge thing to paint. I painted it by hand, and slathered almost half a pot of Badab Black wash over it's metallic areas, it's the last pot and it's almost gone now (too bad!).
Though some people didn't like the little conversion I did, I think the added tail section really, really finishes the model. It's more of a little brother to the Thunderhawk now. I'm really happy with the result so far. Though it's not yet finished. There are a few lenses and lights that still need work and the metal itself needs some highlighting. Last but not least, the chapter heraldry and company markings need to be added, but I will wait with that stuff until the very last (I'm really bad at freehanding).
For the sense of scale, I added a Land Speeder Tempest and a vanguard veteran. The Tempest really fits with the Eagle's aesthetic, especially when looking at the wings.
Anyway, here are some pictures I took (without flash) in broad daylight. Hell yeah, a Guardians of the Covenant Mortikah-pattern Storm Eagle!
Those two words mark the end of one of my most frustrating, but in the end most satisfying project to date.
The Storm Eagle has been one heck of a build and a huge thing to paint. I painted it by hand, and slathered almost half a pot of Badab Black wash over it's metallic areas, it's the last pot and it's almost gone now (too bad!).
Though some people didn't like the little conversion I did, I think the added tail section really, really finishes the model. It's more of a little brother to the Thunderhawk now. I'm really happy with the result so far. Though it's not yet finished. There are a few lenses and lights that still need work and the metal itself needs some highlighting. Last but not least, the chapter heraldry and company markings need to be added, but I will wait with that stuff until the very last (I'm really bad at freehanding).
For the sense of scale, I added a Land Speeder Tempest and a vanguard veteran. The Tempest really fits with the Eagle's aesthetic, especially when looking at the wings.
Anyway, here are some pictures I took (without flash) in broad daylight. Hell yeah, a Guardians of the Covenant Mortikah-pattern Storm Eagle!
Subscribe to:
Posts (Atom)